General Info
General Information
Just started a new game and have no clue what to do? This section is for you — but it isn't only for novices. There's a lot of basic information here you may not be aware of, so it's worth reading carefully before following any walkthrough. It's quite a lot of text, but Might and Magic is a complex game. Consider this section a manual of sorts.
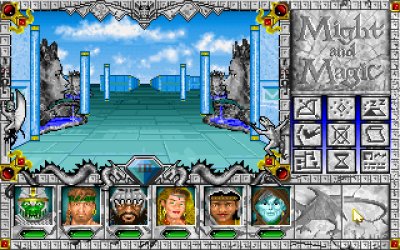
When you've started and named a new game, you'll see this screen:
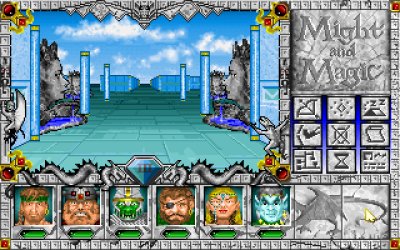
You move with the arrow keys. You can also move the mouse pointer to the edge of the view window — the cursor becomes a directional arrow, and clicking moves you that way. You can either turn left/right and then step forward (usually more convenient), or sidestep left/right (useful in certain situations). If you move with the arrow keys, the left/right keys turn you; to sidestep you must use the mouse.
Don't wander blindly — there are monsters in this town. First, let's prepare. At the bottom of the screen are the portraits of your six pre-generated characters. Click a portrait for a closer look. Clicking the leftmost character, Sir Canegm the Paladin, shows this:
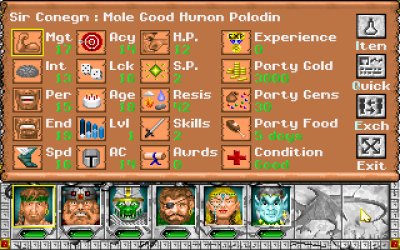
The Status Screen
The first seven symbols are the basic statistics covered in Character Creation. All numbers here are green, meaning they're at their natural maximum (this applies only to the first 12 numbers — things like Gold have no "natural maximum"). The colour code you'll see during play: green = at maximum; yellow = between 25% and 100% of maximum; red = between 0% and 25%; blue = 0 or below; grey = magically raised above maximum. The gems below the portraits follow the same code for HP.
The values after your stats, in screen order:
Age — All characters start at 18 and age a year per year of game time. Characters can also be aged unnaturally (e.g. by a Phantom's touch), which is very hard to reverse early on — avoid it. As you age, your statistics decline; around age 80 they'll be so low the character becomes nearly useless, and a character may simply die of old age after their 80th birthday.
Lvl — Experience level. Click the button to also see how many attacks per round you can currently perform.
AC — Armor Class. The higher it is, the harder it is for monsters to hit the character.
HP — Hit Points. At 0 or less the character falls unconscious; if HP drops too far below 0, or the others flee a battle, the character dies.
SP — Spell Points. 0 for non-casters; casters need SP to cast.
Resis — The character's combined resistances. Click the icon for a breakdown of resistance to Fire, Cold, Electricity, Acid/Poison, Energy and Magic. The higher the value, the better: enemy spells of that element are less likely to hurt the character, and deal reduced damage when they do.
Skills — Number of secondary skills. Click to list them.
Awrds — Number of awards, earned by joining Guilds, completing quests, etc. Click to list them.
Experience — Experience gained, mainly from beating monsters but also from key tasks and things like picking locks. Click to see how much you need for the next level; when it reads "eligible", visit a Training Center to level up.
Party Gold — The party's gold. Click to also see your bank balance.
Party Gems — Like gold, but you can't pay with them; casters need them for certain spells.
Party Food — How much food the party has. With no food, resting restores no health.
Condition — Normally "Good". Beneficial spells (Blessed, Holy Bonus) add +'s after "Good"; ailments display the most serious one. Click for a fuller overview.
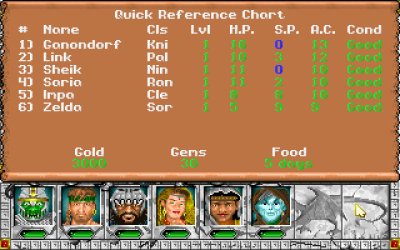
On the side: Item opens the Inventory, Quick shows the Quick Reference screen, Exch swaps this character's position with another, and Exit returns to the game. Opening Sir Canegm's inventory shows:
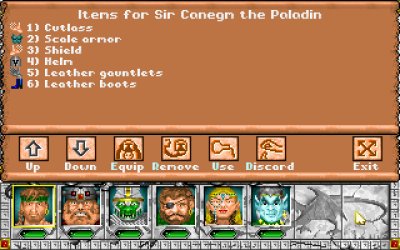
With more than 9 items, use the Up/Down buttons for the next page; each character can hold at most 18 items. You'll Equip what you want worn or used, possibly after Remove-ing something first — you can't wear two armours. Only one each of: Melee Weapon, Off-hand object (a shield, gem, potion, etc. — none if you wield a two-handed melee weapon), Ranged Weapon, Armor, Headgear, Boots, Gauntlets, Cloak, Belt and Necklace. You can equip up to 4 Medals and up to 10 Rings. Discard anything you can't or won't sell, and Use any item with a special function or spell.
Building Your Own Party
Decision time: use all, some, or none of the pre-created characters? The advice is simple — use none. They're all fairly average; you can do better. Finishing the game with them is possible, but customising your party is much more fun. Press the down arrow to walk backwards, right into the Inn.
The Inn is where you create characters and add them to your party. First you'll sign the register — click the "Thumbs Up" to do so (this saves the game) and enter:
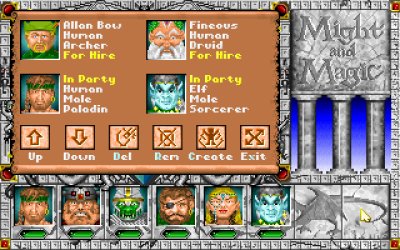
The first two characters here are "For Hire". Click them to see their price (generally higher for higher level and more valuable equipment) and accept or decline. Don't bother much with hirelings for now — they strain your cash flow badly early on, since you pay their wages daily, and wages rise with their levels. Leave these two alone.
The others are your own characters, which you can Remove from the party or Delete permanently. Hit Create and follow the Character Creation section. Add finished characters by clicking their portraits — and don't forget to take the pre-built characters' equipment! Transfer their gear via the Inventory screen (click an item, then the recipient's portrait). Equip your new party as you see fit (use the Item List to see what everything does).
Depending on how many times you entered and left the Inn, you'll face either the Inn's door or your original starting direction. After creating the party used for the walkthrough, the screen looks like this:
The two front characters are not from the standard party — they were deleted so their portraits could be reused. From left to right: a Knight (pure muscle), a Paladin (a little less muscle but strong and versatile), a Ninja (great fighter and decent thief — a thief is a must), a Ranger (the most versatile class), a Cleric (you'll heal a lot, so a powerful healer helps) and a Sorcerer (the strongest Arcane caster, for when swords just don't cut it). Your own choices may differ entirely; any party can finish the game, though it's about ten times as hard without Thievery. The walkthrough assumes you have a thief (Robber or Ninja), so make sure you do.
The Adventuring Icons
Here's what the icons on the right of the screen do.
None of these options save the game. To save, click the large gem near the centre of the screen (the one showing "III", or a compass direction if you have Direction Sense). You'll get a menu to save, load, quit, and toggle music and sound. Ignore the Delay option — modern PCs are too fast for it to matter. There's also a Mr. Wizard Help button, which teleports the party to the Inn in Fountain Head at a cost: every character permanently loses levels (he may take nothing if your characters are still low level). Think carefully before asking — preferably, don't. Note: you have only one save slot, so be careful.
Combat
Time for action — go find a monster. Walk two steps forward, turn right, and walk to one step before the gate (if you're asked whether to leave town, you've gone one step too far — choose "thumbs down" and step back). Turn left to see a long hall. Walk forward and you'll spot something green in the distance; it fires something purple at you — a magical ranged attack, dealing Magic damage (Magic resistance applies). Now choose: rush in for melee, hit Shoot with ranged weapons, or hit Cast. Eventually the green thing reaches you and combat begins:
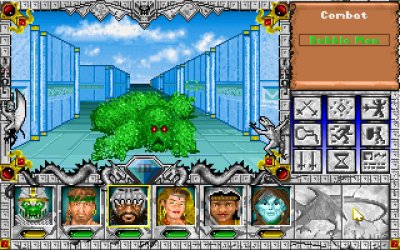
The scroll in the upper-right shows you're in combat mode and lists the enemies, in the familiar colour code (green = full strength, yellow = 25–100% HP, red = under 25%). You can focus on one enemy at a time; switch by clicking a name or pressing 1, 2 or 3. The strongest enemy usually stands centre, the second-strongest left, the weakest right — though here there's just one. The character with the highest Speed acts first; whoever's next has a box around their portrait. When an enemy's turn comes, you'll know — it attacks at once.
Some side buttons change in combat. Cast, Info and Quick Reference remain (Cast now only works for the active character). The rest:
After beating the Bubble Man, the exposed areas of Fountain Head (your starting town) are safe — the other monsters are behind closed gates and thin walls. Now you can explore the town's key buildings, which exist in every town:
The Blacksmith's Shop — Buy and sell equipment, repair broken gear, and identify items (for a price — though the Item List makes that unnecessary). When buying, selecting a character hides the icons of items they can't equip. Open during the day only.
The Training Center — Unlike most RPGs, you level up here by paying Gold once you have enough experience. The cost rises with your level. Daytime only.
The Guild — Buy spells here, but only as a member — find someone in town willing to grant membership first. You can also review your spells here. Open at night only.
The Temple — Heal damage and ailments, and uncurse yourself or your equipment. You can also donate: donate enough and you receive Blessed, Holy Bonus, Heroism and Power Shield for the rest of the day. How many donations it takes depends on the day of the week (once on Onesday, twice on Twosday, etc.) — the more it takes, the greater the blessing. Always open, day or night.
The Inn — Create, add and remove party members, and enlist hirelings. Always open.
The Tavern — The only place to buy food for your journey, and a great source of info. Listen for rumours (they change daily). Buy an ale for one gold via "Drink", then tip the barkeep another gold for something useful. Drinking risks the Drunk ailment — the higher your Endurance, the better you hold your drink.
The Bank — The only bank in Terra is in Fountain Head. Store Gold and Gems safely at 1% interest per day. Open 9 to 5.
The Magic Mirror — Not a building, but one stands in every town. Approach it and it asks your destination; if you know the password, it whisks you there instantly.
That turned into quite a detailed manual — hopefully a useful one. Head to the walkthrough (starting at Fountain Head) to begin your quest.
Oh — you don't even know your quest yet, do you? Sheltem, your arch-nemesis, has seized the Pyramids of the Ancients, which legend says hold the secret of interdimensional travel. You can't let him keep that power, so once again you set out to finish him off for good — something you failed to do in the first two Might and Magic games. Good luck!